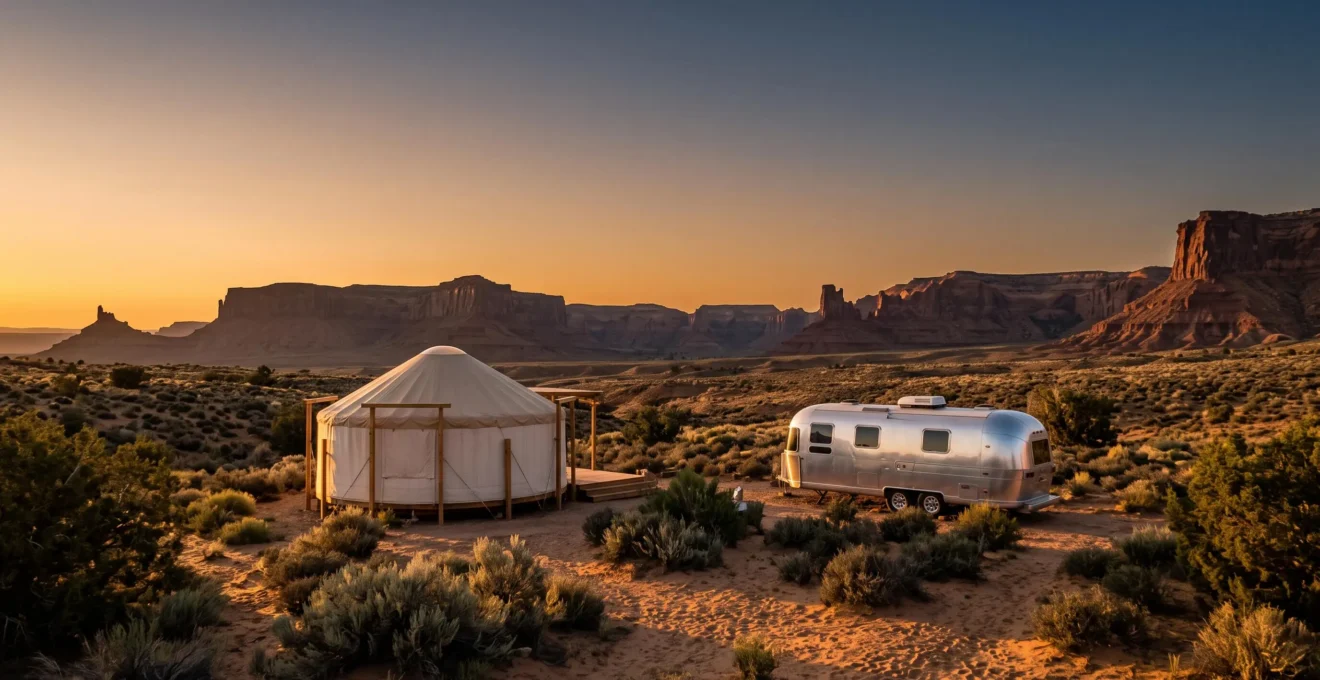
Glamping comfort isn’t about the real bed; it’s determined by the “invisible infrastructure” and physical realities hidden behind the pretty facade.
- Extreme temperature swings in domes and yurts are a real challenge that requires specific engineering to solve.
- The term “private bathroom” can mean anything from a luxury suite to a composting toilet a short walk away.
- Vintage Airstreams and other unique structures are often much smaller in person due to camera lens distortion and curved designs.
Recommendation: When booking, scrutinize reviews for specific mentions of temperature control, bathroom distance and type, and usable space, not just aesthetics.
The image is irresistible: a perfectly styled Airstream gleaming in the desert sunset, or a geodesic dome with a triangular window framing a starry sky. For couples seeking a photo-génique escape, the allure of glamping in the USA is undeniable. It promises the adventure of the outdoors with the comforts of a boutique hotel. The typical advice centers on this blend of “glamour” and “camping,” highlighting the presence of a real bed and stylish decor as the primary markers of comfort.
But as someone who has tested these unique accommodations, I’ve learned a crucial lesson: the most beautiful photo doesn’t always translate to the most comfortable stay. The real comfort equation is more complex. It hinges on the invisible infrastructure—the quality of insulation, the type of toilet, the reality of physical space—that the camera rarely captures. The key question isn’t *if* it’s comfortable, but *what* specific, often hidden, factors actually create that comfort.
This guide moves beyond the glossy pictures. We will dissect the practical realities that determine whether your stunning getaway is a restful dream or a frustrating challenge. We’ll explore the thermal dynamics of domes, decode the meaning of “private bathroom,” confront the illusion of space in vintage trailers, and understand why this experience often costs more than a standard hotel. This is the honest conversation you need before you book.
To help you navigate these unique stays, this article breaks down the essential factors that separate a truly comfortable glamping experience from a merely photogenic one. Discover what to look for, what to ask, and how to ensure your adventure is as relaxing as it is beautiful.
Summary: An Honest Guide to Glamping and Rustic Cabin Comfort
- Hot by day, cold by night: how do you manage the thermals in a geodesic dome?
- Compost toilets or a private bathroom: what does “separate bathroom” really mean?
- The mistake of leaving valuables in an unlocked canvas tent
- Reality vs. Photo: why is the vintage Airstream smaller than it looks?
- Price per night: why does glamping cost more than a classic hotel?
- The budget oversight that costs families £500 on a US road trip
- How do you light a wood stove without smoking out the cabin?
- Essential Packing List for Staying in a Remote Rustic Cabin
Hot by day, cold by night: how do you manage the thermals in a geodesic dome?
One of the biggest shocks for first-time glampers in a dome or yurt is the thermal vulnerability. These structures, especially those in exposed environments like deserts or open fields, act like greenhouses. During the day, the sun can bake the interior, making it uncomfortably hot. At night, the thin fabric shell loses heat rapidly, leading to a surprising chill, even in summer.
This is where the quality of the “invisible infrastructure” becomes paramount. Basic domes have a single layer of fabric, offering minimal protection. Higher-end models, however, use sophisticated multi-layer insulation. Independent testing shows that specialized glamping dome insulation fabric can achieve an R-value equivalent of 2.85, which significantly slows heat transfer. This, combined with features like radiant floor heating or a powerful, thermostat-controlled wood stove, makes a world of difference.
As you can see, the vast exposure to the elements is what makes these structures so visually stunning, but also so challenging to keep comfortable. The solution isn’t just about insulation value. As one architectural expert notes, a holistic approach is necessary. True comfort depends on a combination of factors working together to create a stable indoor climate.
A structure’s R-value is only one part of thermal performance; air-tightness and moisture management are equally critical to prevent drafts and condensation.
– Architectural expert, Yurt vs. Dome Insulation: The Architect’s Guide to True Glamping Comfort, WHET Magazine
Before you commit, look for reviews that specifically mention “heat in the afternoon” or “cold at night.” A host who has invested in proper insulation, ventilation (like solar-powered fans), and an adequate heating/cooling source is one who understands the true meaning of glamping comfort.
Compost toilets or a private bathroom: what does “separate bathroom” really mean?
The term “private bathroom” on a glamping listing can be one of the most misleading phrases in the world of unique stays. For a couple worried about comfort, this detail is critical. Unlike a hotel where “private” means an en-suite with flushing toilet and hot shower, in the glamping world, it can mean a wide spectrum of facilities. It could be a luxurious, spa-like bathroom in a separate, heated structure just steps away. Or, it could mean a clean but very basic composting toilet in a small wooden outhouse 50 yards from your tent.
The difference often comes down to the property’s access to utilities and the host’s investment. An off-grid location without access to a septic system requires creative—and often expensive—solutions. A basic composting toilet is a simple, eco-friendly option. However, more advanced systems exist to provide a hotel-like experience. For example, a high-end, waterless incinerating toilet provides exceptional hygiene but is a significant investment; a quality system can cost over $4,000 for the unit alone, before installation.
This “invisible infrastructure” cost is a major factor in the nightly rate and the level of comfort you receive. The key is to manage expectations by verifying specifics. Don’t be shy about asking the host direct questions: Is the toilet flushing, composting, or incinerating? Is the shower in the same structure as the toilet? How far is the bathroom from the sleeping area, and is the path lit at night? These details separate a romantic getaway from a midnight stumble through the dark.
Look for photos of the actual bathroom facilities in the listing. If there are none, that’s a red flag. A host proud of their comfortable, clean, and convenient bathroom will be eager to show it off.
The mistake of leaving valuables in an unlocked canvas tent
The idyllic, open-to-nature vibe of glamping can lull you into a false sense of security. While many glamping sites are located in remote, peaceful areas, a canvas tent or yurt rarely offers the same security as a hotel room with a deadbolt. Many safari-style tents or yurts close with zippers that can’t be locked from the outside. This means when you leave for a day of hiking or exploring, your belongings—laptops, cameras, wallets—are left in a fundamentally unsecured space.
This is a risk many travelers overlook, assuming their travel insurance will cover any potential loss. However, this is a dangerous assumption. Many standard travel insurance policies have surprisingly low limits for theft and may include clauses about “due care.” If your belongings are stolen from an unlocked tent, the insurer could argue you didn’t take reasonable steps to secure them. Furthermore, reimbursement limits can be low; for instance, some policies cap theft reimbursement at up to $750 for the entire trip, which may not even cover the cost of a modern smartphone or camera.
It’s also a mistake to assume your home insurance will provide a safety net. As insurance provider Feather explains, your personal property is often not covered when it’s outside your primary residence.
Household contents insurance typically does not cover simple theft outside your insured location.
– Feather Insurance, Does household contents insurance cover me while I am traveling?
The best practice is simple: treat your glamping tent like a soft-top convertible car. Never leave valuables inside when you’re away. Lock them in your vehicle’s trunk or, better yet, take them with you. Inquire if the host provides a locker or a secure place to store items at the main office. This small precaution ensures your peaceful retreat isn’t ruined by a preventable loss.
Ultimately, the best security is discretion. Avoid displaying expensive electronics or cash, and always choose sites with consistently positive reviews that mention a safe and respectful environment.
Reality vs. Photo: why is the vintage Airstream smaller than it looks?
The classic Airstream trailer is an icon of American design, and photos of their polished aluminum shells and cozy interiors are pure Instagram gold. But be warned: there’s a form of photographic deception at play. Real estate and travel photographers often use wide-angle lenses to make small spaces appear more open and expansive than they truly are. When you step inside a vintage Airstream for the first time, the most common reaction is, “Wow, it’s smaller than I thought.”
The iconic curved design, while beautiful, eats into the usable interior space. The walls and ceiling curve inward, reducing headroom and shelf space. A classic Airstream’s usable living space is often only 15 ft. long and 7 ft. wide, which is significantly smaller than a standard hotel room. This compact footprint requires a minimalist approach to packing and living. Two people with large suitcases will quickly find themselves tripping over their luggage.
As this close-up of the riveted wall shows, the pronounced curvature is a defining feature that directly impacts the interior volume. Every inch counts in these spaces. Experienced Airstream dwellers learn to use clever storage tricks, like hanging organizers and multi-functional furniture, to maximize the limited area. For a short-term stay, the best strategy is to pack light and keep your belongings organized. Use soft-sided duffel bags instead of rigid suitcases, as they are easier to store in odd-shaped nooks.
This isn’t to say an Airstream can’t be comfortable—it absolutely can. The cozy, self-contained environment is part of its charm. But arriving with the right expectations about the space is key to enjoying the experience rather than feeling cramped.
Before booking, look for photos that show people inside the Airstream to get a better sense of scale. A photo of the bed with a wide-angle lens can be deceiving, but a photo of someone sitting on that bed tells a much more honest story about the space.
Price per night: why does glamping cost more than a classic hotel?
One of the most frequent questions from prospective glampers is about the price. “Why does a night in a fancy tent cost as much as, or even more than, a 4-star hotel room?” The answer lies in the economies of scale and the high operational costs of running a unique, often off-grid, accommodation. A hotel has hundreds of rooms sharing infrastructure like plumbing, electricity, and housekeeping staff. A glamping site might only have a handful of units, each requiring its own dedicated, and often custom-built, support systems.
The “invisible infrastructure” is the primary cost driver. Providing hot water, electricity, and a comfortable bathroom to a remote dome in the desert is a significant engineering and financial challenge. This often involves expensive solar power arrays, deep-drilled wells, and specialized septic or composting systems. As we’ve seen, a high-end toilet alone can be a major investment. These costs are inevitably baked into the nightly rate.
Case Study: The Real Cost of a Glamping Bathroom
An analysis of glamping toilet infrastructure shows that higher-end systems (such as incinerating toilets) increase a host’s upfront investment, VAT, import, and servicing costs, but in return let the site charge higher nightly rates and improve guest experience — illustrating one of the many invisible operational costs baked into a glamping bill that a standard hotel room does not carry. This data, drawn from an analysis of glamping toilet infrastructure, highlights how guest comfort is a direct result of a host’s capital investment.
Furthermore, you are paying for the experience and the exclusivity. You’re not just buying a room; you’re buying a curated experience with privacy, silence, and a direct connection to nature—luxuries that are hard to find in a city hotel. It’s a different value proposition, one that prioritizes environment over amenities.
Luxury isn’t chandeliers — it’s light, silence, and the circle’s calm.
– The OutFactory, Geodesic Domes for Resorts & Retreats
When you see a high price tag, instead of comparing it to a hotel, ask what it includes. Does it offer access to private land, unique views, or a level of silence and solitude that’s simply unattainable elsewhere? Often, that is what you are truly paying for.
The budget oversight that costs families £500 on a US road trip
For international visitors, especially families from the UK or Europe planning a dream road trip across the USA, an exciting itinerary can be quickly soured by unexpected costs. There is one particular budget oversight that I’ve seen catch many families by surprise, potentially adding up to £500 or more to a two-week trip: the dual trap of rental car insurance and National Park entry fees.
First, car rental. When you book a rental car online from abroad, the headline price often looks very reasonable. The trap lies in the insurance waivers offered at the rental counter in the US. Agents are trained to upsell Collision Damage Waivers (CDW) and Loss Damage Waivers (LDW), which can add $30-$50 per day to your bill. Over 14 days, that’s an extra $420-$700 (£340-£570). The key is to arrange this coverage *before* you travel, either through a “zero-excess” policy from a third-party provider in your home country or by using a credit card that includes primary rental insurance.
The second part of the trap is for families planning to visit multiple iconic National Parks like Zion, Bryce Canyon, and the Grand Canyon. Paying the entry fee at each park gate individually ($35 per car, per park) adds up quickly. Four parks would cost $140. The far more economical solution is to purchase the “America the Beautiful” Pass. For a one-time fee of around $80, it grants a car full of people access to all National Parks and Federal Recreational Lands for an entire year. Buying this pass at the first park you visit can save you a significant amount over the course of your trip.
By pre-booking the right insurance and buying the annual park pass, a family can easily save hundreds of dollars—money that is much better spent on a memorable meal, a guided tour, or a more comfortable place to stay.
How do you light a wood stove without smoking out the cabin?
Arriving at a remote, rustic cabin and seeing a beautiful cast-iron wood stove is a romantic vision. The reality, however, can quickly turn into a smoke-filled nightmare if you don’t know how to light it properly. The common mistake is to follow the “teepee” method taught in scouting: a small pile of kindling at the bottom with larger logs on top. This method often fails in a cold stove and chimney, leading to a backdraft of smoke into the room.
As an experienced tester of these cabins, I’ve learned the most effective and cleanest way is the “top-down” or “upside-down” fire method. It’s counter-intuitive but produces far less smoke and creates a hotter, more efficient fire faster. Here’s the simple, step-by-step process:
- Open the Damper: Before you do anything, find the stove’s damper or air intake lever and open it fully. This ensures maximum airflow up the chimney.
- Build the Base: Place two or three of your largest, driest split logs on the floor of the firebox. Pack them closely together to form a solid platform.
- Add the Middle Layer: Lay a second layer of smaller-sized logs on top of the base, running them in the opposite direction (like a log cabin).
- Create the Top Layer: Add a final layer of your smallest, thinnest pieces of kindling. Leave small gaps for air to circulate.
- Light from the Top: Place your fire starter (a bit of newspaper, a commercial fire starter, or dryer lint) on the very top of the kindling pile and light it.
By lighting the fire from the top, the smoke from the initial flames has a clear path up the chimney, which it begins to warm immediately. As the fire burns downwards, it pre-heats the logs below, allowing them to ignite and burn cleanly without smoldering. This simple change in technique is the secret to a cozy, smoke-free cabin experience.
Once the fire is roaring and the main logs have caught, you can gradually reduce the air intake via the damper to control the burn rate and maintain a steady, comfortable heat throughout the evening.
Key takeaways
- True glamping comfort is an engineering challenge, not an aesthetic one; look for signs of investment in insulation and climate control.
- The definitions of “private” and “luxury” are highly subjective in unique stays. Always verify the specifics of bathroom facilities and other amenities.
- The structure itself dictates the experience; a dome has thermal challenges, an Airstream has space limitations, and a tent has security considerations.
Essential Packing List for Staying in a Remote Rustic Cabin
While the allure of a remote cabin is its simplicity, a comfortable stay depends on being prepared for its unique challenges. Unlike a hotel, there’s no front desk to call if you forget something or if an amenity isn’t working. Your packing list should go beyond clothes and toiletries; it should be a toolkit for self-sufficiency. Before you even pack, however, the most important thing is to perform a quick audit upon arrival to understand what you’re working with.
The experience is about adapting to the environment, and being prepared is the ultimate comfort. Forget a generic packing list; what you truly need is a mental checklist to run through the moment you walk in the door. This ensures you identify any critical issues while there’s still daylight to solve them. Think of it as a pre-stay audit for your rustic home.
Your Remote Cabin Arrival Audit
- Points of Contact: Immediately check for cell service at various points in and around the cabin. If there’s no service, locate the host’s emergency contact information and any provided landline.
- Resource Inventory: Before unpacking, take stock of essential supplies. Is there enough dry firewood and kindling for at least the first night? Confirm the source of potable water (tap, filter, or bottled). Locate the first-aid kit.
- Amenity Verification: Cross-reference the cabin’s actual features with the online listing. Does the stove work? Is there hot water? Are there enough blankets and towels? Test the lights and outlets.
- Security & Environment Scan: Check that doors and windows lock properly. Do a quick walk around the exterior to be aware of your surroundings, like steep drop-offs or animal trails.
- Integration Plan: Based on your audit, create a quick plan. If it gets dark early, start the fire now. If water needs boiling, get a pot on the stove. Prioritize tasks that ensure your comfort and safety for the first night.
Now that you’re equipped with the right questions to ask and the practical realities to look for, you can start searching for your next unique stay—not just for the perfect photo, but for the genuine, comfortable experience that awaits.